1.はじめに
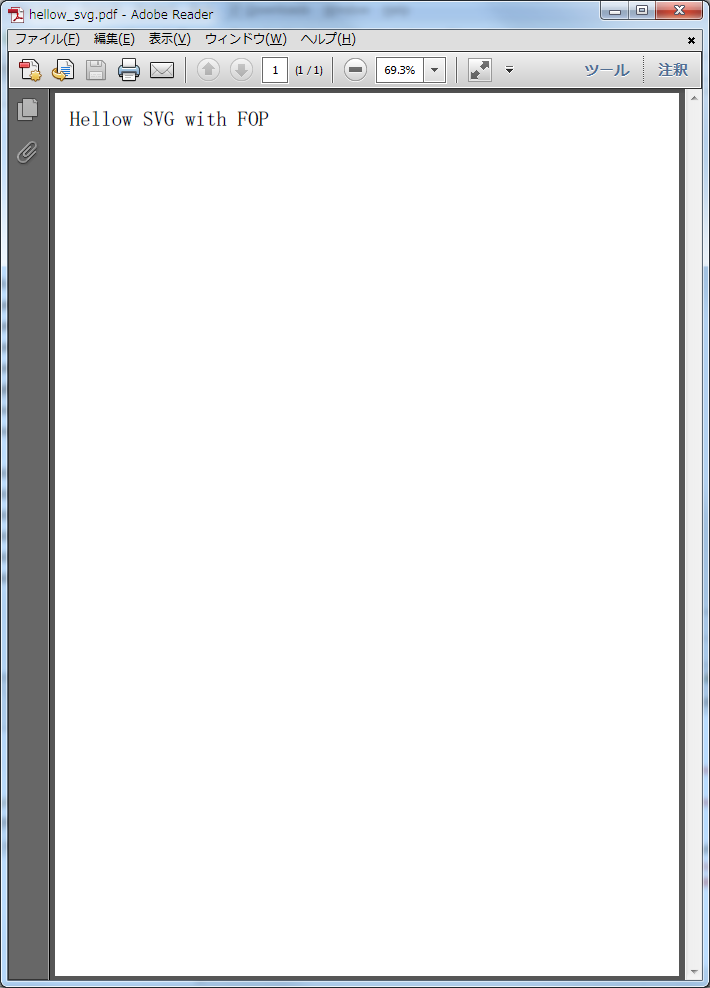
このブログにたどりついた、検索エンジンのキーワードを調べると、SVGを利用したApache FOPの使用方法について、知りたいと思われる読者がいると思われます。そのような理由で、今日は、簡単にSVGを利用したApache FOPの使用方法について、とても簡単に説明したいと思います。連携の仕方は、すごく簡単です。図 1は、SVGをXSL-FO文書に埋め込み場合です。15行目にある、<fo:instream-foreign-object>要素を使用します。子要素は、SVG形式そのものです。図 2は、XSL-FO文書の外部にあるSVGを利用する場合です。15行目にある、<fo:external-graphic>要素を使用します。また注意点としては、src属性で指定するURIは、XSL-FO文書からの相対パスではなく、プログラムから見た相対パスです。図 3のhellow_svg.svgは、XSL-FO文書で参照されるSVGです。図 4のhellow_svg.pdfは、出力結果です。
Apache FOPのバイナリ配布に含まれるサンプルプログラムに、SVGを利用したサンプルがあります。パスは、「fop-1.0-bin/fop-1.0/examples/fo/svg」です。
(SyntaxHighlighterを使用して、XSL-FO、XMLを掲載しています。ブラウザー上で、各々の図の右上のアイコンをマウスでクリックすることで、ソースを表示したり、クリップボードにコピーしたり、印刷したりできます。注意点として、「さらに記事を読み込む」のリンクで、この記事を読み込んだ場合に、SyntaxHighlighterによる表示が不正になる場合がありますので、恐れ入りますが、タイトルをクリックして再表示して下さい。)
図 1. hellow_svg_embedding.fo
<?xml version="1.0" encoding="UTF-8" ?>
<fo:root xmlns:fo="http://www.w3.org/1999/XSL/Format" xml:lang="ja">
  <fo:layout-master-set>
    <fo:simple-page-master page-width="210mm" page-height="297mm" margin-top="0mm" margin-left="0mm" margin-right="0mm" margin-bottom="0mm" master-name="PageMaster">
      <fo:region-body margin-top="0mm" margin-left="0mm" margin-right="0mm" margin-bottom="0mm"/>
      <fo:region-before extent="0mm" />
      <fo:region-after extent="0mm" />
      <fo:region-start extent="0mm" />
      <fo:region-end extent="0mm" />
    </fo:simple-page-master>
  </fo:layout-master-set>
  <fo:page-sequence master-reference="PageMaster">
    <fo:flow flow-name="xsl-region-body">
      <fo:block>
        <fo:instream-foreign-object content-width="210mm" content-height="297mm">
          <svg xmlns:xlink="http://www.w3.org/1999/xlink" xmlns="http://www.w3.org/2000/svg"
          width="210mm" height="297mm" font-size="20"
              stroke-width="0.1mm" font-family="MS 明朝">
            <text x="4.9mm" y="10.5mm" fill="black">Hellow SVG with FOP</text>
          </svg>
        </fo:instream-foreign-object>
      </fo:block>
    </fo:flow>
  </fo:page-sequence>
</fo:root>
図 2. hellow_svg_external.fo
<?xml version="1.0" encoding="UTF-8" ?>
<fo:root xmlns:fo="http://www.w3.org/1999/XSL/Format" xml:lang="ja">
  <fo:layout-master-set>
    <fo:simple-page-master page-width="210mm" page-height="297mm" margin-top="0mm" margin-left="0mm" margin-right="0mm" margin-bottom="0mm" master-name="PageMaster">
      <fo:region-body margin-top="0mm" margin-left="0mm" margin-right="0mm" margin-bottom="0mm"/>
      <fo:region-before extent="0mm" />
      <fo:region-after extent="0mm" />
      <fo:region-start extent="0mm" />
      <fo:region-end extent="0mm" />
    </fo:simple-page-master>
  </fo:layout-master-set>
  <fo:page-sequence master-reference="PageMaster">
    <fo:flow flow-name="xsl-region-body">
      <fo:block>
        <fo:external-graphic src="hellow_svg.svg"/>
      </fo:block>
    </fo:flow>
  </fo:page-sequence>
</fo:root>
図 3. hellow_svg.svg
<?xml version="1.0" encoding="UTF-8"?>
<svg xmlns:xlink="http://www.w3.org/1999/xlink" xmlns="http://www.w3.org/2000/svg"
width="210mm" height="297mm" font-size="20"
    stroke-width="0.1mm" font-family="MS 明朝">
  <text x="4.9mm" y="10.5mm" fill="black">Hellow SVG with FOP</text>
</svg>
図 4. hellow_svg.pdf
2.注意事項
SVGを利用したデータ可視化のためのグラフ作成の記事で説明しましたが、XSL-FO文書を介して、SVGをPDFで出力する際、Apache FOPの制限で、フィルター処理を使用したSVGをPDFにすると正しく表示されませんので注意が必要です。FOPのバイナリ配布に含まれるサンプルプログラムの「ExampleSVG2PDF.java」を利用すれば、SVGを直接PDF化するので、フィルター処理のものもうまく処理されます。
3.総評
SVGには、ご存知のとおりいろいろな機能があります。SVGの機能を利用することで、既存の商用の帳票作成ツールでは、できないようなデザインを、自由自在にできます。Apache FOPの可能性と日本語設定の記事で紹介したとおり、コンビ請求書のようなデザインも可能です。
©中條勝徳 and okulejp.com, 2012.
1.はじめに
Apache FOPを利用するにあたり、Apache FOPのTIFF出力の方法 のブログで紹介したTIFF出力とPDF出力に使用したものと同じXSL-FOドキュメントを例に、実際のシステム開発で役立つ、Apache FOPの使用方法を説明したいと思います。Apache FOPを使用するために、帳票出力などに出力するデータは、XML形式のデータでなくてはなりません。しかし実際にXML形式で出力するとなると、DOMなどのXMLを扱うプログラムを利用しなければなりません。そのためのコストも余分にかかります。しかし、JAXBを利用することで、XMLを簡単に作成することができます。一般的な帳票の出力データ形式は、そんなに複雑なものではないはずです。ここでは、単一項目と、繰返し項目のデータを扱います。図 2. fax.xsdがそのためのXMLスキーマです。XMLスキーマは、XMLマスターベーシック試験より少し難しい程度で、この後にでてくるXSLTの部分に関しても、XMLマスターベーシック試験を取得している人なら難しくないはずです。
(SyntaxHighlighterを使用して、XMLスキーマ、XSLT、Java、XMLを掲載しています。ブラウザー上で、各々の図の右上のアイコンをマウスでクリックすることで、ソースを表示したり、クリップボードにコピーしたり、印刷したりできます。注意点として、「さらに記事を読み込む」のリンクで、この記事を読み込んだ場合に、SyntaxHighlighterによる表示が不正になる場合がありますので、恐れ入りますが、タイトルをクリックして再表示して下さい。)
2.帳票出力するまでの準備作業の流れ
- XSL-FO文書の実サンプルの作成。
- XMLの様式とXMLスキーマの作成。
- XSLTの作成。
- JAXBによるクラス生成。
- XMLとXSLTから、XSL-FOドキュメントを作成して、帳票を作成するJavaプログラムの作成。
XSL-FO文書の実サンプルを作成します。データのXMLの様式とXMLスキーマの作成をします。その後、XSL-FO文書の動的に変わる部分を、XSLTを使用して書き直します。XMLスキーマを元に、JAXBを使用してXMLとJavaオブジェクトをマッピングするクラスを作成します。生成されたクラスを使用してXMLデータを作成します。ここで示した流れ以外にもいろいろあると思いますが、これが一番わかりやすいと思います。
3.実際の出力結果
図 1. PDF出力(クリックするとPDFを表示します。)


4.帳票出力項目について
帳票の出力項目は、単一出力では、「発行日」、「送信者会社名」、「送信者TEL」、「送信者FAX」、「宛先名」、「宛先TEL」、「宛先FAX」、「宛先郵便番号」、「合計金額」、「消費税」と「合計金額(税込)」の11項目。複数出力では、「商品名」、「価格」、「単価」と「金額」の4項目で、合計15項目です。
5.fax.xsdのXMLスキーマについて
送信者と宛先の内容は共通化できるので、使用するXMLの型は共通となっています。ただし、送信者の方には、郵便番号がないので、29行目で、minOccurs=”0″としています。複数出力の項目は、複数出力されるように、maxOccurs=”unbounded”としています。
図 2. fax.xsd
<?xml version="1.0" encoding="UTF-8"?>
<xs:schema version="1.0" targetNamespace="https://okulejp.wordpress.com/fax"
 xmlns:tns="https://okulejp.wordpress.com/fax" xmlns:xs="http://www.w3.org/2001/XMLSchema"
 elementFormDefault="qualified">

  <xs:element name="fax" type="tns:faxType"/>

  <xs:complexType name="faxType">
    <xs:sequence>
      <xs:element ref="tns:issueDate"/>
      <xs:element ref="tns:destination"/>
      <xs:element ref="tns:sender"/>
      <xs:element ref="tns:items"/>
      <xs:element ref="tns:sum"/>
    </xs:sequence>
  </xs:complexType>

  <xs:element name="issueDate" type="xs:string"/>
  <xs:element name="destination" type="tns:company"/>
  <xs:element name="sender" type="tns:company"/>
  <xs:element name="items" type="tns:itemsType"/>
  <xs:element name="sum" type="tns:sumType"/>

  <xs:complexType name="company">
    <xs:sequence>
      <xs:element name="name" type="xs:string"/>
      <xs:element name="tel" type="xs:string"/>
      <xs:element name="fax" type="xs:string"/>
      <xs:element name="postCode" type="xs:string" minOccurs="0"/>
    </xs:sequence>
  </xs:complexType>

  <xs:complexType name="itemsType">
    <xs:sequence maxOccurs="unbounded">
      <xs:element ref="tns:item"/>
    </xs:sequence>
  </xs:complexType>

  <xs:element name="item" type="tns:itemType"/>

  <xs:complexType name="itemType">
    <xs:sequence>
      <xs:element name="productName" type="xs:string"/>
      <xs:element name="number" type="xs:int"/>
      <xs:element name="unitPrice" type="xs:int"/>
      <xs:element name="price" type="xs:int"/>
    </xs:sequence>
  </xs:complexType>

  <xs:complexType name="sumType">
    <xs:all>
      <xs:element name="taxAmount" type="xs:int"/>
      <xs:element name="consumptionTax" type="xs:int"/>
      <xs:element name="tax-includedPrice" type="xs:int"/>
    </xs:all>
  </xs:complexType>

</xs:schema>
6.fax.xslのXSLTについて
XSLTにおける関数使用について、XSLTで使用できる関数は、バージョンが1.0なら、「XML Path Language (XPath) Version 1.0」の4 Core Function Libraryにあるもの、2.0なら「XQuery 1.0 and XPath 2.0 Functions and Operators(Second Edition)」にあるものが使用できます。
XSLTでXpathの関数を用いて、金額から5%かけて消費税を求めても良かったのですが、消費税が変わったときに、XSLTも変更しないといけないので、XMLデータから消費税を取得しました。XMLデータから消費税率を取得して、XSLTで消費税を計算する方法もあると思います。XMLデータで取得したものを出力するか、XSLTで計算したものを出力するかは、ケースバイケースだと思います。
47行目で、fo:table要素に、table-omit-footer-at-break=”true”を指定すると、フッターは繰り返されません。
81行目で、format-number(fax:sum/fax:consumptionTax, ‘#,###’)の’#,###’は、3桁ごとにカンマを表示するという意味です。
107行目で、fo:table-cell要素に、keep-together.within-column属性を追加して、その属性値にalwaysを指定しています。行が複数ページにまたがるのを防ぐためです。ない場合は、項番18の内容が複数ページに分割されます。
119行目で、ループが最終行の場合、fo:table-cell要素に、属性値が、last-pageのid属性を追加しています。これは、23行目のfo:page-number-citation要素が参照していて、最終ページ番号を取得しています。(Apache FOPが、実際の出力時に、商品詳細の最後の部分がどのページ番号になるのかを計算してくれます。)
市販の帳票作成ツールでは、表のソート機能がありますが、XSLTでも、xsl:sort要素を使用することでソートできます。102行目のxsl:for-eachの後に、xsl:sort要素を追加します。またxsl:sort要素を複数追加した場合は、ソートキーは複数になります。
図 3. fax.xsl
<?xml version="1.0" encoding="UTF-8"?>
<xsl:stylesheet xmlns:xsl="http://www.w3.org/1999/XSL/Transform" version="1.0"
 xmlns:fax="https://okulejp.wordpress.com/fax">
  <xsl:template match="/">
    <xsl:apply-templates select="fax:fax" />
  </xsl:template>

  <xsl:template match="fax:fax">
    <fo:root xmlns:fo="http://www.w3.org/1999/XSL/Format" xml:lang="ja">
      <fo:layout-master-set>
        <fo:simple-page-master page-height="297mm" page-width="210mm" margin-top="0mm" margin-left="0mm" margin-right="0mm" margin-bottom="0mm"
          master-name="PageMaster">
          <fo:region-body margin-top="10mm" margin-left="10mm" margin-right="10mm" margin-bottom="20mm" />
          <fo:region-before extent="10mm" />
          <fo:region-after extent="10mm" />
          <fo:region-start extent="10mm" />
          <fo:region-end extent="10mm" />
        </fo:simple-page-master>
      </fo:layout-master-set>
      <fo:page-sequence master-reference="PageMaster" font-family="MS ゴシック">
        <fo:static-content flow-name="xsl-region-after">
          <fo:block text-align="center" font-size="15pt">
            ( <fo:page-number />/<fo:page-number-citation ref-id="last-page" /> )
          </fo:block>
        </fo:static-content>
        <fo:flow font-family="MS ゴシック" flow-name="xsl-region-body">
          <fo:block-container absolute-position="absolute" top="0mm" left="130mm">
            <fo:block font-size="11pt">発行日 <xsl:value-of select="fax:issueDate" /></fo:block>
          </fo:block-container>
          <fo:block text-align="center" space-before="2mm" border-after-style="solid" border-after-width="thin" font-size="xx-large">御請求書</fo:block>
          <fo:block-container absolute-position="absolute" top="20mm" left="00mm">
            <fo:block font-size="15pt">会社名 <xsl:value-of select="fax:destination/fax:name" /></fo:block>
            <fo:block font-size="13pt">TEL <xsl:value-of select="fax:destination/fax:tel" /></fo:block>
            <fo:block font-size="13pt">FAX <xsl:value-of select="fax:destination/fax:fax" /></fo:block>
            <fo:block></fo:block>
          </fo:block-container>
          <fo:block-container absolute-position="absolute" top="25mm" left="150mm">
            <fo:block font-size="14pt"><xsl:value-of select="fax:sendern/fax:name" /></fo:block>
            <fo:block font-size="12pt">〒 <xsl:value-of select="fax:sender/fax:postCode" /></fo:block>
            <fo:block font-size="12pt">TEL <xsl:value-of select="fax:sender/fax:tel" /></fo:block>
            <fo:block font-size="12pt">FAX <xsl:value-of select="fax:sender/fax:fax" /></fo:block>
            <fo:block></fo:block>
          </fo:block-container>
          <fo:block-container id="test" absolute-position="absolute" top="50mm" left="00mm">
            <fo:block font-size="12pt">下記の通り、ご請求申し上げます。</fo:block>
          </fo:block-container>
          <fo:table table-layout="fixed" font-family="MS ゴシック" top="100%" width="20%" font-size="14pt" space-before="47mm" table-omit-footer-at-break="true">
            <fo:table-column column-number="1" column-width="15mm" />
            <fo:table-column column-number="2" column-width="80mm" />
            <fo:table-column column-number="3" column-width="15mm" />
            <fo:table-column column-number="4" column-width="40mm" />
            <fo:table-column column-number="5" column-width="40mm" />
            <fo:table-header background-color="gray">
              <fo:table-row>
                <fo:table-cell border-style="solid">
                  <fo:block text-align="center" margin-top="0.2em" margin-bottom="0.2em">項番</fo:block>
                </fo:table-cell>
                <fo:table-cell border-style="solid">
                  <fo:block text-align="center" margin-top="0.2em" margin-bottom="0.2em">商品名</fo:block>
                </fo:table-cell>
                <fo:table-cell border-style="solid">
                  <fo:block text-align="center" margin-top="0.2em" margin-bottom="0.2em">数量</fo:block>
                </fo:table-cell>
                <fo:table-cell border-style="solid">
                  <fo:block text-align="center" margin-top="0.2em" margin-bottom="0.2em">単価</fo:block>
                </fo:table-cell>
                <fo:table-cell border-style="solid">
                  <fo:block text-align="center" margin-top="0.2em" margin-bottom="0.2em">金額</fo:block>
                </fo:table-cell>
              </fo:table-row>
            </fo:table-header>
            <fo:table-footer>
              <fo:table-row>
                <fo:table-cell number-columns-spanned="3" number-rows-spanned="3">
                  <fo:block>備考</fo:block>
                </fo:table-cell>
                <fo:table-cell background-color="gray" padding="4pt" border-style="solid">
                  <fo:block font-weight="bold" text-align="center">合計</fo:block>
                </fo:table-cell>
                <fo:table-cell padding="4pt" border-style="solid">
                  <fo:block font-weight="bold" text-align="right"><xsl:value-of select="format-number(fax:sum/fax:taxAmount, '#,###')" /></fo:block>
                </fo:table-cell>
              </fo:table-row>
              <fo:table-row>
                <fo:table-cell background-color="gray" padding="4pt" border-style="solid">
                  <fo:block font-weight="bold" text-align="center">消費税</fo:block>
                </fo:table-cell>
                <fo:table-cell padding="4pt" border-style="solid">
                  <fo:block font-weight="bold" text-align="right"><xsl:value-of select="format-number(fax:sum/fax:consumptionTax, '#,###')" /></fo:block>
                </fo:table-cell>
              </fo:table-row>
              <fo:table-row>
                <fo:table-cell background-color="gray" padding="4pt" border-style="solid">
                  <fo:block font-weight="bold" text-align="center" font-family="MS Pゴシック">合計(税込)</fo:block>
                </fo:table-cell>
                <fo:table-cell padding="4pt" border-style="solid">
                  <fo:block font-weight="bold" text-align="right"><xsl:value-of select="format-number(fax:sum/fax:tax-includedPrice, '#,###')" /></fo:block>
                </fo:table-cell>
              </fo:table-row>
            </fo:table-footer>
            <fo:table-body>
              <xsl:for-each select="fax:items/fax:item">
                <fo:table-row>
                  <fo:table-cell border-style="solid" padding="0.4em">
                    <fo:block text-align="center"><xsl:value-of select="position()" /></fo:block>
                  </fo:table-cell>
                  <fo:table-cell keep-together.within-column="always" border-style="solid" padding="0.4em">
                    <fo:block>
                      <xsl:value-of select="fax:productName" />
                    </fo:block>
                  </fo:table-cell>
                  <fo:table-cell border-style="solid" padding="0.4em">
                    <fo:block text-align="right"><xsl:value-of select="fax:number" /></fo:block>
                  </fo:table-cell>
                  <fo:table-cell border-style="solid" padding="0.4em">
                    <fo:block text-align="right"><xsl:value-of select="format-number(fax:unitPrice, '#,###')" /></fo:block>
                  </fo:table-cell>
                  <fo:table-cell border-style="solid" padding="0.4em">
                    <xsl:if test="position() = last()">
                      <xsl:attribute name="id">last-page</xsl:attribute>
                    </xsl:if>
                    <fo:block text-align="right"><xsl:value-of select="format-number(fax:price, '#,###')" /></fo:block>
                  </fo:table-cell>
                </fo:table-row>
              </xsl:for-each>
            </fo:table-body>
          </fo:table>
        </fo:flow>
      </fo:page-sequence>
    </fo:root>
  </xsl:template>
</xsl:stylesheet>
7.JAXBの使用方法
fax.xsdのスキーマを元に、バインディングコンパイラxjcを用いてJavaのクラスに生成します。コマンドラインから実行する方法と、Eclipseから実行する方法を示します。
●コマンドイランから実行する方法。スキーマファイル名を引数にしてxjcを呼び出すだけです。バインディングコンパイラxjcは、JDK 6以上に含まれています。
カレントディレクトリのcom/wordpress/okulejp/faxフォルダに7つのファイルが生成されました。
 C:\Users\okule>"C:\Program Files (x86)\Java\jdk1.6.0_30\bin"\xjc C:\temp\jaxb\fax.xsd
 parsing a schema...
 compiling a schema...
 com\wordpress\okulejp\fax\Company.java
 com\wordpress\okulejp\fax\FaxType.java
 com\wordpress\okulejp\fax\ItemType.java
 com\wordpress\okulejp\fax\ItemsType.java
 com\wordpress\okulejp\fax\ObjectFactory.java
 com\wordpress\okulejp\fax\SumType.java
 com\wordpress\okulejp\fax\package-info.java
 C:\Users\okule>
●Eclipseから実行する方法。
図 4. fax.xsdを右クリックして、コンテキストメニューを表示させ、「Generate」→「JAXB Classes…」を選択します。

図 5. New JAXB Classes from schema設定画面が表示されたら、「Finish」ボタンを押下します。

8.Fax.javaについて
XMLの要素名とJavaの型名が対応しているので、DOMに比べてXMLを作成するのが簡単で、それでいてXMLスキーマ違反になりにくいです。
74から77行目で、XMLスキーマ検証を行っています。
クラスパスにXSLTプロセッサのプロバイダが、クラスパス上に複数ある場合に、使用するXSLTプロセッサを指定できます。88と90行目で、Xalanを使う場合と、Saxonを使う場合が示されています。詳細は、TransformerFactory.newInstance(String factoryClassName, ClassLoader classLoader) に載っています。
図 6. Fax.java
package com.wordpress.okulejp.fax;

import java.io.BufferedOutputStream;
import java.io.File;
import java.io.FileOutputStream;
import java.io.IOException;
import java.io.OutputStream;
import java.io.StringWriter;
import java.io.StringReader;
import javax.xml.bind.JAXBContext;
import javax.xml.bind.JAXBElement;
import javax.xml.bind.Marshaller;
import javax.xml.transform.Result;
import javax.xml.transform.sax.SAXResult;
import javax.xml.transform.stream.StreamResult;
import javax.xml.transform.stream.StreamSource;
import javax.xml.transform.Transformer;
import javax.xml.transform.TransformerFactory;
import javax.xml.transform.OutputKeys;
import javax.xml.validation.Schema;
import javax.xml.validation.SchemaFactory;
import javax.xml.XMLConstants;
import org.apache.fop.apps.FOUserAgent;
import org.apache.fop.apps.Fop;
import org.apache.fop.apps.FopFactory;
import org.apache.fop.apps.MimeConstants;

public class Fax {
  public static void main(String[] args) {
    OutputStream out = null;
    try {
      JAXBContext context = JAXBContext.newInstance("com.wordpress.okulejp.fax");
      ObjectFactory ojb = new ObjectFactory();
      //fax要素の作成
      FaxType faxType = ojb.createFaxType();
      JAXBElement<FaxType> fax = ojb.createFax(faxType);
      //発行日
      faxType.setIssueDate("平成24年08月12日");
      //宛先
      Company company = ojb.createCompany();
      company.setName("株式会社A総務部御中");
      company.setTel("03-3333-3333");
      company.setFax("03-3333-3334");
      faxType.setDestination(company);
      //送信者
      company = ojb.createCompany();
      company.setName("株式会社B");
      company.setTel("05-5555-5555");
      company.setFax("05-5555-5556");
      company.setPostCode("999-9999");
      faxType.setSender(company);
      //商品詳細
      ItemType itemType = null;
      ItemsType itemsType = ojb.createItemsType();
      for(int i=0; i<22; i++) {
        itemType = ojb.createItemType();
        itemType.setProductName("ブルーレイレコーダー");
        itemType.setNumber(1);
        itemType.setUnitPrice(120000);
        itemType.setPrice(120000);
        itemsType.getItem().add(itemType);
      }
      faxType.setItems(itemsType);
      itemsType.getItem().get(3).setProductName("ブルーレイレコーダー12345678901234567890");
      itemsType.getItem().get(17).setProductName("ブルーレイレコーダー1234567890123456789012345678901234567890");
      //金額合計
      SumType sumType = ojb.createSumType();
      sumType.setTaxAmount(2640000);
      sumType.setConsumptionTax(132000);
      sumType.setTaxIncludedPrice(2772000);
      faxType.setSum(sumType);

      // XMLスキーマ検証
      Marshaller marshaller = context.createMarshaller();
      SchemaFactory schemaFactory = SchemaFactory.newInstance(XMLConstants.W3C_XML_SCHEMA_NS_URI);
      Schema schema = schemaFactory.newSchema(new File("src/com/wordpress/okulejp/fax/fax.xsd"));
      marshaller.setSchema(schema);

      // マーシャリング
      StringWriter marshallerStringWriter = new StringWriter();
      marshaller.setProperty(Marshaller.JAXB_ENCODING, "UTF-8");
      marshaller.setProperty(Marshaller.JAXB_FORMATTED_OUTPUT, true);
      marshaller.marshal(fax, marshallerStringWriter);
      System.out.println(marshallerStringWriter.toString());

      //TransformerFactoryクラスの実装を選択する。(明示しない場合は、プラットホームのデフォルトのものが使用される。)
      //Xalanを使用する場合。
      //TransformerFactory trf = TransformerFactory.newInstance("org.apache.xalan.processor.TransformerFactoryImpl", null);
      //Saxonを使用する場合。Saxonは、XSLT2.0に対応。
      //TransformerFactory trf = TransformerFactory.newInstance("net.sf.saxon.TransformerFactoryImpl", null);

      //入力XMLとXSLTから、XSL-FOドキュメントを作成する。
      TransformerFactory trf = TransformerFactory.newInstance();
      Transformer transformer = trf.newTransformer(new StreamSource("src/com/wordpress/okulejp/fax/fax.xsl"));
      java.util.Properties xmlProps = new java.util.Properties();
      xmlProps.setProperty(OutputKeys.VERSION, "1.0");
      xmlProps.setProperty(OutputKeys.INDENT, "yes");
      transformer.setOutputProperties(xmlProps);
      StringReader stringReader = new StringReader(marshallerStringWriter.toString());
      StreamSource streamSource = new StreamSource(stringReader);
      StringWriter foStringWriter = new StringWriter();
      StreamResult streamResult = new StreamResult(foStringWriter);
      transformer.transform(streamSource, streamResult);
      System.out.println(foStringWriter.toString());

      //XSL-FOドキュメントから、PDFを作成する。
      FopFactory fopFactory = FopFactory.newInstance();
      FOUserAgent foUserAgent = fopFactory.newFOUserAgent();
      fopFactory.setUserConfig(new File("fop.xconf"));
      out = new FileOutputStream("src/com/wordpress/okulejp/fax/fax.pdf");
      out = new BufferedOutputStream(out);
      Fop fop = fopFactory.newFop(MimeConstants.MIME_PDF, foUserAgent, out);
      Result result = new SAXResult(fop.getDefaultHandler());
      stringReader = new StringReader(foStringWriter.toString());
      streamSource = new StreamSource(stringReader);
      transformer = trf.newTransformer();
      transformer.transform(streamSource, result);
    } catch (Exception e) {
      e.printStackTrace();
      System.exit(1);
    } finally {
      try {
        if(out!=null) {
          out.close();
        }
      } catch(IOException io) {
        io.printStackTrace();
        System.exit(1);
      }
    }
  }
}
図 7. fax.xml(Fax.javaで作成されたXML。)
<?xml version="1.0" encoding="UTF-8" standalone="yes"?>
<fax xmlns="https://okulejp.wordpress.com/fax">
  <issueDate>平成24年08月12日</issueDate>
  <destination>
    <name>株式会社A総務部御中</name>
    <tel>03-3333-3333</tel>
    <fax>03-3333-3334</fax>
  </destination>
  <sender>
    <name>株式会社B</name>
    <tel>05-5555-5555</tel>
    <fax>05-5555-5556</fax>
    <postCode>999-9999</postCode>
  </sender>
  <items>
    <item>
      <productName>ブルーレイレコーダー</productName>
      <number>1</number>
      <unitPrice>120000</unitPrice>
      <price>120000</price>
    </item>
    <item>
      <productName>ブルーレイレコーダー</productName>
      <number>1</number>
      <unitPrice>120000</unitPrice>
      <price>120000</price>
    </item>
      :
      :
     省略
      :
      :
    <item>
      <productName>ブルーレイレコーダー</productName>
      <number>1</number>
      <unitPrice>120000</unitPrice>
      <price>120000</price>
    </item>
  </items>
  <sum>
    <taxAmount>2640000</taxAmount>
    <consumptionTax>132000</consumptionTax>
    <tax-includedPrice>2772000</tax-includedPrice>
  </sum>
</fax>
9.総評
fax.xsdから、JAXB Classesを生成すれば、XMLを意識することなく、Javaのsetterとgetterメソッドを用いて、XMLデータを作成するのがとても簡単なのがわかります。特に、DOMによるXMLを作成したことがある人なら、すごく簡単にXMLを作成できることが実感できると思います。固定様式の帳票を作成するときの入力XMLデータの様式は、一定または、ほぼ一定であると思うので、XMLスキーマファイルを難なく作成できると思います。JAXBをEclipse上で簡単に利用できるので、XMLバインドツールの敷居が低くなったと思います。またEclipseでは、XMLスキーマ、XSLT2.0のコード補完機能が利用できるので開発効率が上がります。それに加えて、XMLスキーマを選択して、マウスで右クリックしてコンテキストメニューを表示し、XMLファイルを生成することができます。またこのブログで掲載したとおり、fop.xsdを利用することで、Apache FOPのコード補完機能も利用できます。
10.参照
「Java SE 6完全攻略」第73回 JAXB その1
上記のサイトは、JAXBをより深く学ぶのに非常に役立ちます。いろいろなサイトを検索して探しましたが、一番わかりやすくて体系づけられて説明されています。連載は、「第80回 JAXB その8」まであります。
©中條勝徳 and okulejp.com, 2012.
1.はじめに
今日は、Apache FOPの機能を利用した、TIFF出力について説明したいと思います。システム開発において、FAX送信機能を実現するにあたり、TIFFイメージが必要なときがあると思います。Apache FOPを利用することで、同じXSL-FO文書を流用して、PDFだけでなく、TIFFも出力できます。
2.環境設定
- Javaライブラリのインストール
TIFFの圧縮方式のCCITT T.4 (Fax Group 3)及び、CCITT T.6 (Fax Group 4)には、 Java Advanced Imaging Image I/O Toolsが必要です。下記からダウンロードできます。Apache FOPの公式サイトのJava Advanced Imaging Image I/O Toolsへのリンク先が古いので、見つけるのに苦労しました。
(jai_imageio-1_0_01-lib-windows-i586-jdk.exeを実行すれば、「jdkインストールフォルダ\jre\lib\ext」にjai_imageio.jarがインストールされます。jai_imageio-1_0_01-lib-windows-i586-jre.exeを実行すれば、「jreのインストールフォルダ\lib\ext」にjai_imageio.jarがインストールされます。)
Java Advanced Imaging Image I/O Toolsのダウンロードサイトへ
- 圧縮方式は、<compression>タグの内容で指定します。詳細は、TIFF-specific Configurationに掲載されています。またfop.xconfファイルは、Apache FOPの公式サイト Archive Downloadのbinariesまたは、sourceに含まれています。
図 1. fop.xconfの修正部分(下記の例は、CCITT T.6です。)
<renderer mime="image/tiff">
  <transparent-page-background>true</transparent-page-background>
  <compression>CCITT T.6</compression>
</renderer>
- PDFの日本語フォント設定は、<fonts>タグに、<auto-detect/>タグを追加するだけで、日本語フォントが使用できます。使用できるフォントは、Type 1 FontとTrueType Fontです。詳細は、Basic font configurationに掲載されています。
図 2. fop.xconfの修正部分
<renderer mime="application/pdf">
  <filterList>
    <value>flate</value>
  </filterList>
  <fonts>
    <auto-detect/>
  </fonts>
</renderer>
3.JavaプログラムにおけるTIFF出力
ExampleFO2PDF.javaの修正例 (ExampleFO2PDF.javaは、Apache FOPの公式サイト Archive Downloadのbinariesまたは、sourceに含まれています。)
- 67行目の「FOUserAgent foUserAgent = fopFactory.newFOUserAgent();」の後に、「fopFactory.setUserConfig(new File(“fop.xconf”));」を追加します。
- 77行目の「Fop fop = fopFactory.newFop(MimeConstants.MIME_PDF, foUserAgent, out);」のMIME_PDFをMIME_TIFFに修正します。
- 128行目の「File fofile = new File(baseDir, “xml/fo/helloworld.fo”);」のファイル名を修正します。
- 130行目の「File pdffile = new File(outDir, “ResultFO2PDF.pdf”);」のファイル名を修正します。
4.使用したXSL-FO文書
http://www7b.biglobe.ne.jp/~okule/okule/wordpress/FAX/fax.foからダウンロードできます。
5.実際の出力結果 (Chrome バージョン 23.0.1271.97 mで画像が、正しく表示されません。原因を調査中。)
図 3. TIFF出力 圧縮形式はCCITT T.6 (クリックするとTIFFをダウンロードまたは表示します。またマルチTIFFファイルなので、Windows フォトビューアーでご覧下さい。ペイントでは1ページ目しか表示できません。)


図 4. PDF出力(クリックするとPDFを表示します。)
6.fax.foのXSL-FO文書の解説
- 出力結果の項番18のセルは、fo:table-cell要素に、keep-together.within-column=”always”を指定しないと、複数ページに分割されます。
- ヘッダーは、項番、商品名、数量、単価、金額です。フッターは、合計、消費税、合計(税込)です。fo:table要素に、table-omit-footer-at-break=”true”を指定すると、フッターは繰り返されません。
- フッターには、fo:table-cell要素に、列の結合数を示す、number-columns-spanned属性と、行の結合数を示す、number-rows-spanned属性を使用しています。備考という文字は、結合されたセルに表示されています。
- 16行目の<fo:page-number-citation ref-id=”last-page” />は、id属性がlast-pageのものを参照していて、id属性がlast-pageである要素の実際のページ数を示しております。この例の場合は、466行目のfo:table-cell要素が出力されるページ数を示しております。このようにして、全体のページ数を取得するとができます。
7.総評
自動組版ソフトの便利さを感じるところは、セルの高さをセルの内容に応じて調節してくれることです。これは、固定様式の帳票では、実現がかなり難しいと思います。今日は、実際にApache FOPを使用するにあたって役立ちそうなXSL-FOの使用テクニックをいくつか紹介しました。ここで紹介したテクニックは、XSL-FOのほんの一部分でしかありません。まだまだ、いろいろなてテクニックがあります。みなさんも一緒に学んでいきましょう。
©中條勝徳 and okulejp.com, 2012.